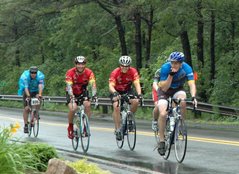
Rule #1: Never, never, never make adjustments to your bike the night before the ride. Give yourself a week to ride the bike after you’ve replaced equipment, adjusted derailleurs, brakes, etc. This is to make sure that everything is working as it should .....and nothing falls off!
Tires - Be sure your tires and tubes are in good shape, and fully inflated. Under inflated tires create more rolling resistance, causing you to work harder. Replace tires that show signs of deteriorating rubber or large cuts. Tires can fail catastrophically ...and with significant consequences! If you have off-road tires, consider replacing them with "slicks" as this will greatly reduce rolling resistance. Have with you a couple spare tubes, a patch kit, a pump or CO2 cartridges, and tire "irons", so you can fix a flat. There are bike mechanics at some of the rest stops, and SAG wagons patrolling the route, but if you get a flat, you'll be glad you can fix it yourself.
Derailleurs/Shifters - Be sure your derailleurs are properly adjusted, operate smoothly, and that the cables are not frayed. Lubricate the derailleurs and cables.
Chain - Clean and lubricate your chain the week before the MS150. With all the training miles you've ridden, your chain has picked up some grit, a little effort in cleaning and lubricating your chain will give you a smoother (and quieter) ride. Better yet, if you can't remember the last time you cleaned your chain, it's probably time to replace it - you might be surprised to find out a new chain only costs only $10-$25 and will reduce the wear on your cassette.
Wheels - Check that your spokes are tight, and that your wheels are "true". If your brakes rub intermittently, that's a good sign you've got a wobble. If needed, you'll probably want to have a bike shop true your wheels as this is a specialist job.
Brakes - Make sure your brakes operate smoothly and effectively. Check your brake cables and if they're worn, frayed or gritty, replace them. Make sure that your brakes are adjusted so that you can apply lots of breaking force without the brake levers contacting the handlebars.
Pedals - If you use clipless pedals, be sure the cleats on your shoes haven't loosened, and that they are adjusted so your feet are neither slanted inward or outward unnaturally. If you feel like your knees are being forced in or out when you're clipped in, you probably need to adjust the cleats on your shoes. Periodic lubrication will help make them easy to get into and out of. Make sure that the pedal axles are not loose.
Wheel Hubs: If you have unsealed hubs, the front and rear hubs should be repacked yearly. Check to see that there is not excess play in the axles, that the cones on the axles are not pitted, and that the bearings are not worn. If any of the above are true, it’s time to overhaul the hubs.
Cranksets: Not much to do here. Make sure that the chainwheel bolts are on tight and that the teeth of the chainrings are not excessively worn.
Headsets: Make sure they are properly lubricated and adjusted. Replace the headset if you have pitted races.
Bottom brackets: These are typically sealed, so lubrication is not an issue. Make sure that there is not play in the bottom bracket (that it is screwed into the bottom bracket shell securely).
Handlebars and stem: Make sure that these are tight and aligned correctly.
Saddle: If the one you are riding is not comfortable now is the time to find one that fits. Saddle fit is very individual - take your time and seek advise of experienced riders or bike shop professionals. A saddle that fits you is worth its weight in gold. (But remember it does take time for your body to get conditioned to even the best of saddles.)
If you are wondering what a derailleur is or what kind of wheel hubs you have drop me a quick email.
regards,
Miguel
Subscribe to:
Post Comments (Atom)

No comments:
Post a Comment